Make-Up Application Techniques and Tips

Finding the right shade and tone for your face and your look requires practice. And as the saying goes, practice makes perfect, so put in the time and effort now so that when that big event comes up, you know what to do. This will save time for you hair and outfit.

New Things to Try

If you want your makeup to look a certain way or you just want to experiment, now is the perfect time to do it. Maybe you want to try a more complicated eyeshadow look, or you want to try to make an ombré lipstick. Here are some things you could try while at home:

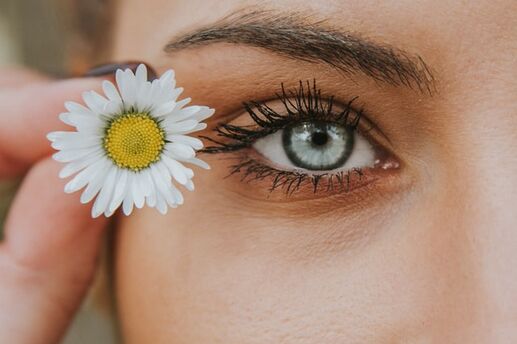
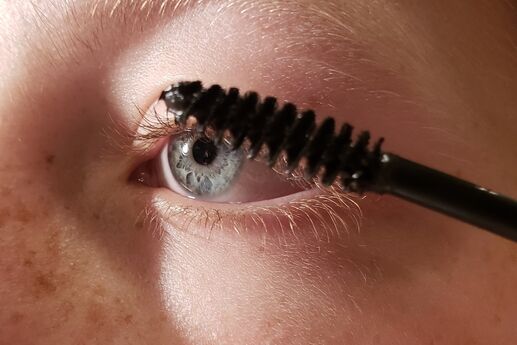
Eyeshadow & Eyeliner

Even the experts are still learning how they can improve their eyeshadow and blending skills. It is okay if you don't get the exact look you want your first try. Eyes are the hardest part of a general makeup routine. The most common form of eyeshadow is in a powder form. Powder eyeshadows usually include mattes, shimmers, metallics, foils, glitters, and duo-chromes. Other forms may include creme or liquid eyeshadow. If you are new to makeup, maybe use some neutral shades, and maybe a shimmery bronze shade to put on your eyelid. If you are more experienced in the world of makeup, maybe try doing eye looks with more vibrant colors, or perfecting the art of eyeliner. You could try doing a pink eyeshadow look without looking sick, a cut crease using concealer or a smokey eye. Or you could learn to do eyeliner in your waterline, or winged eyeliner using a liquid formula. The possibilities for eyeshadow experiments are endless. No matter how experienced you are in makeup, blending is the key ingredient to a flawless eyeshadow look.
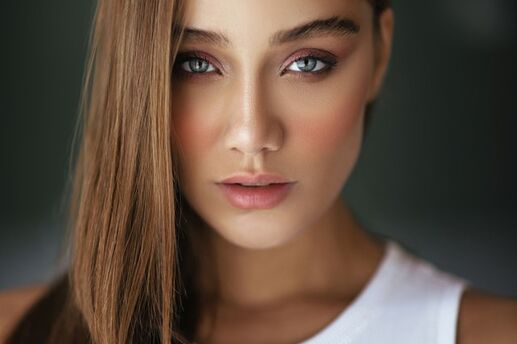
Foundation/Base

Foundation is called "foundation" for a reason. It is the foundation of your makeup. Foundation is supposed to make your skin look flawless and perfected, followed by concealer. The two main forms of foundation are creme (which usually comes in a stick component) or liquid. Both can be blended out with a beauty sponge or a brush. You want the foundation to be properly blended into the skin, so that it doesn't look cakey. Do not get foundation to make your skin look lighter or darker. When buying your foundation or concealer, make sure that it doesn't oxidize or look a different way on your skin after some time that you don't like or doesn't look good. Keep in mind of what undertone you are as well, whether you are cool-toned or warm-toned.

Lips

Your lips are a very important part of your makeup. They can determine what kind of look you are going for, and they can come in all types of forms. Since 2014, many makeup brands have put out a Liquid-to-Matte lipstick formula, which have become permanent products in lots of peoples' makeup kits. But some people don't like the drying feeling of a Matte Lipstick or Liquid Lipstick, so they might resort to lip gloss, lip liner, or a creme lipstick. Another very popular and unique Liquid Lipstick formula is the Kylie Cosmetics Velvet Liquid Lipstick, which doesn't dry down to a matte texture, but feels more creamy on the lips and is less drying. Now is the perfect time to find out what is your favorite type of lipstick, and you have a lot of choices. You may want to try a lip liner with a matching lipstick or lip gloss. You could wear a lip that you would never wear out in public, just to get some use out of it and see if you like it. Or try a lipstick with a darker lip liner, topped by a glittery pigment or gloss to create an ombre lip. Or, you could simply just practice applying the different types of lip products. Maybe try out a lip scrub as well and add it to your everyday life.
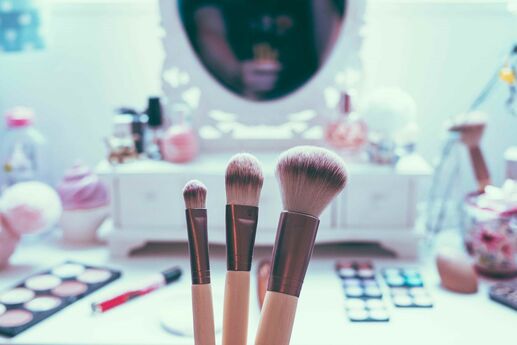
Contour/Bronzer

Lots of people like to look very tan when they wear makeup, but instead of going to the tanning salon, they have a home remedy to make them look tanned by the sun. There are three types of contour: liquid, creme, and powder. When it comes to the liquid contour, many people just use a darker concealer shade and apply it straight to the face, and then blend it out with a brush or sponge. Creme contour sticks are very popular in today's makeup world. You simply just apply the product to your face and then blend it out. Simple as that. Some people might get powder contour and bronzer mixed up. When you contour, the idea is that your face looks chiseled and defined, and bronzer makes you look tanner. Sometimes, someone will have a darker contour shade underneath their bronzer. If you don't know where you are supposed to contour, here are some tips: lots of people use the "3" technique, where they make a "3" shape on the side of their face. The top of the three is on your forehead, the middle just underneath your cheekbone, and the bottom on your jawline. Most people use a brush to do this technique. Another way of applying contour or bronzer is to just apply it underneath the cheekbone. Some people also contour their nose to make it look a certain way, or their lips so that they look bigger. With contour, the most important thing to remember is to contour your face to fit your face, not the way you see it in every YouTube tutorial.

Blush/Highlighter- Blush and highlighter are some of the fun and easier parts of a general makeup routine. Just like contour, they can come in multiple forms such as creme and powder. Some people even like to use lipstick as a blush and lightly dab it on their cheeks. Blush is applied to the apples of the cheeks to give a rosy hue. Blush is applied with a brush shaped to fit the cheek. Highlighter comes in creme, liquid, and powder forms. While some people like a subtle glow, others like blinding highlighters that look like mirrors on their face. You usually apply highlighter to the cheekbones, nose and on the Cupid's Bow on the lips to give a nice (or insane!) glow to the face. Use a brush to apply highlighter, but if the color or pigmentation is too intense for you, just go over it with a beauty blender.

Like this article? Get more by following us on Facebook at Beauty & Confidence.


Stay at Home Make-Up Tips

Most of us are now into April with stay-at-home orders still in effect due to the global health crisis. Stuck inside for a month now, we've come up with all sorts of activities to do to keep us busy and stave off the boredom like as as playing cards, streaming video, doing puzzles, or consuming way too much social media. But just like any other skill, if you're looking to perfect your look for when the health restrictions are lifted, practice makes perfect. So why not get our your pallets out and spend a couple of hours getting you ready for you first outing when the stay-at-home order are lifted? Supplies can easily be ordered online, so no need to worry about running out of base or foundation and liner while you practice you technique. Just don't use too much toilet paper for clean-up!

Here are a few tips for a fun makeup practice session:

Find a good Spot to Work

A good mirror and good lighting are the keys to properly applying makeup. The bathroom usually has good light, so that is a good option. Or, if you have a dedicated makeup station in your room with a good mirror and a place for your supplies, then do it there. You want a place where you can work quietly and effectively.

Set the Mood

Sometimes listening to your favorite podcast or music playlist can get your creative juices flowing. You phone and decent speaker are great tools you can add to your makeup kit. Just make sure the batteries are charged up! Some people find doing their makeup and skincare therapeutic. If you are doing your makeup in the morning, maybe have a cup of coffee or tea. Maybe even FaceTime, Zoom, or call a friend or family member to get feedback and opinions.

Make Sure You Tools are Clean

Clean brushes are always a great way to start a practice session, so make sure your makeup kit is in order and your brushes are clean and you products are not broken or expired. To tell if your products are expired, simply smell the product. If it smells odd, then maybe it is time to throw it out. Also, check the expiration date on the component or the outside package. There should be a little container symbol that will tell you how long it lasts (example: 12 months).

When pandemic and health crisis over, we'll have regrets about not getting six-pack abs or writing a novel, so don't waste this valuable opportunity. You've got some extra time on your hands, put it to good use by working on your make-up skills!


The Secrets to Smudge-Proof Makeup

All too often, I catch glimpses of women with unknowingly smeared lipstick and raccoon-like eye makeup on the street. Hey, it happens -- but it doesn’t have to! As a makeup artist for Good Morning America, it’s my job to make sure the anchors and reporters look perfect from the show’s start to finish. With those hot studio lights and high-pressure scenarios, it’s a challenge to make their makeup smudge- and budge-proof.

Over the years, I’ve learned a few tricks that really work. With these following tips, you’ll look flawless for hours.

1. Choose the right foundation.
Finding the right foundation that won’t look caked-on after a few hours is essential. The best product depends on your skin type. Experiment with drugstore concealers to find the right one. Sephora-brand concealers are also dependable. They come in a variety of shades for all skin tones and rarely require reapplication throughout the day. I like how they sink into the skin, leaving a nice, natural look.

2. Finish with translucent powder.
Television anchors are constantly under bright studio lights. My trick for keeping them shine-free: I use a translucent powder, which leaves skin with a matte finish. I recommend doing a touchup through the course of a day. Use a facial tissue to gently blot the skin and remove excess oil. Then reapply the translucent powder.

3. Go waterproof.
How often have you looked in the mirror to see smeared mascara or a black under-eye smudge? To prevent this from happening, use waterproof mascara. Some can leave your eyelashes looking brittle or clumpy, so test out a variety of brands.

4. Prime your lids and lips.
Creased, smudged eye shadow is one of the biggest beauty blunders I see. But one simple step can prevent this from happening: First, prime your lid with concealer. Without a primer, the makeup has nothing to hold onto -- and the natural oils in your skin will cause it to slide off and crease. So gently dab a little concealer onto your eyelid before applying any eye makeup.

You can also use this same trick for your lips. Using a finger, blend your concealer right onto your lips. If you find that this causes your lip color to look too light, try filling in your entire lip with a natural-colored lip liner. Then blot with a facial tissue before slicking on your lipstick.

Photo by Angelos Michalopoulos on Unsplash

A Mom’s Guide to Looking Effortlessly Chic

Whether you’re a brand-new mama who equates showering with insta-chic or a veteran parent who can’t so much as pee alone, it’s hard not to look at put-together moms like Gwyneth Paltrow and Michelle Obama and wonder how they find the time to look so amazing. Answer: an entourage of stylists and makeup artists. But even if your entourage only consists of little ones, these quick tips will help you look paparazzi-ready in a flash.

Set up a beauty station by the front door.
Ever dash out of the house only to catch your reflection later and wince? To the rescue: Set up a mommy beauty station by the door. Simply hang a mirror and fill a basket (ideally out of reach to your kiddos) with your get-ready-quick essentials. A few suggestions: a hairbrush and dry shampoo to instantly upgrade your locks, concealer to mask any under-eye circles, blush or bronzer for a sweep of color, mascara to open up your eyes, and a box of facial tissues for quick beauty touchups.

Add stylish accents to your go-to outfits.
Guess what? You can maintain a uniform of cotton shirts and jeans as long as you accessorize smartly. A colorful, patterned scarf can add interest to a V-neck and boyfriend jeans (not to mention mask any spit-up or food stains). Skinny jeans and a plain top are instantly date-night-ready with a touch of costume jewelry and glam heels or fun flats. Invest in easy statement pieces, like a bright blazer, you can throw on before a parent-teacher conference that will instantly elevate your ensemble.

Streamline your makeup routine.  
Ah, if only you had the time to labor over creating the perfect cat eye. But you’d be surprised how far a minimal look -- with minimal products -- can go toward boosting your confidence. Opt for multitasking makeup, like a BB cream, an above-and-beyond tinted moisturizer that also contains SPF, antioxidants and other antiaging components. Instead of stressing out about perfectly applying lipstick, opt for a simple tinted lip gloss or stain. If you’re constantly on the go, an eyelash curler can do wonders to instantly give eyes a lift without the mess of mascara.

Borrow from Baby.
If your beauty budget has given way to a college fund, take note: There’s a treasure trove of goodies already in your nursery. Use your little one’s lotion for the eau de bébé that everyone absolutely loves. Your baby’s chemical-free shampoo will leave your hair super-soft without stripping it of essential oils. Can’t find time to shower? Even if you don’t use baby powder at the changing table, dabbing it on your scalp and the shiniest areas of your hair can hold you over in between washings.

Have a signature style. One of Gwynnie’s biggest chic secrets? This mama has confidence. But if the baby drool on your shoulder has you feeling not-so self-assured, here’s a quick trick: Add something to your look that’s only yours. Tie a fun kerchief to your purse that you rotate every so often, and never leave the house without swiftly applying a bright lip color. Crumbs all over your clothes? Check. Signature statement necklace? Hey, you’ve got something going for

Photo by Nojan Namdar on Unsplash

Beauty Tips 101: How to Apply Self-Tanner

After a long winter, you’re ready to toss the extra layers. But while the spring brings longer days, you won’t get any color from the five-minute walk from your car to office. Besides, you know that spending too much time in the sun can expose you to harmful UV rays.

The solution? Self-tanners are a safer option, and you can apply them at home. Whether you’re a self-tanning pro or novice, our guide will help you achieve an even golden glow without the streaks. Get ready to transform your complexion from ghostly white to a sun-kissed glow.

Step 1: Get prepped.

For the self-tanner to set in evenly, your skin should be as fresh as possible. Shave your legs and exfoliate any area that you’re self-tanning, with a liquid exfoliating scrub.

Step 2: Apply self-tanner from bottom to top.
Wearing latex gloves, gently apply self-tanner onto your skin. Start at your feet and slowly move up your body to avoid awkward positions, and make sure everything goes on smoothly and evenly. Keep a box of facial tissues on hand to wipe away any excess.

Step 3: Smooth out streaks.
Areas with thinner skin -- your feet, knees, elbows, wrists and ankles -- are susceptible to streaking. Go over these areas carefully to ensure the tan doesn’t look patchy. To avoid streaks on your palms, wipe them down with a tissue after you’re finished.

Step 4: Wait and see.
You need to give the self-tanner the chance to seep in and do its thing, so avoid showering or sleeping (unless you want streaked sheets) for at least six hours afterward. To avoid getting the product on your clothes, wear a loose, old T-shirt. Once your tanner has set, be sure to moisturize each day. Keeping your skin hydrated will extend the length of that gorgeous glow.