
DIY Spa Day: 5 Cheap and Easy Steps
Between work and household responsibilities, chances are you’re in need of some relaxation and TLC. A day at the spa might do the trick. In fact, one study in the journal Complementary Therapies in Medicine found that spa visits were linked to better physical and mental health.
But finding the kind of time and money required for a spa day could cause more stress rather than put you at ease. So instead, set aside an afternoon in your own home and treat yourself to these DIY beauty treatments.
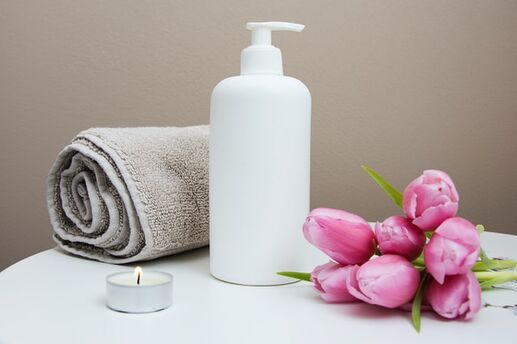
DIY Spa Day Step No. 1: Set the mood.
Your bathroom might be the most practical room for an at-home spa experience, but it also may be the least tranquil. Take a few minutes to get rid of anything that reminds you of household chores, like dirty laundry or stacks of toilet paper.
Then, change into comfortable clothes, light a scented candle and cue up some soothing tunes. According to Australian research, music and nature sounds can help reduce anxiety while increasing relaxation.
DIY Spa Day Step No. 2: Kiss chapped lips goodbye.
What we put on our bodies should be as safe as what we put in our bodies -- especially when it comes to the face, says Lori Conte, a New York City–based beauty expert. “Spa treatments made from food-based ingredients -- like sugar and salt scrubs -- are popular because they’re healthy and all-natural,” she says. “And they’re great for the skin.”
To make an exfoliating (and edible!) sugar scrub for dry lips, try Conte’s recipe: Mix 1 teaspoon of fine castor sugar with 1 teaspoon of sweet almond oil. Gently rub the mixture around the contours of your lips for 30 seconds, then wash off with water and wipe away excess with tissues, which are soft and won’t irritate delicate lip skin.
DIY Spa Day Step No. 3: Go green.
Avocados have antibacterial and antimicrobial properties; when applied to your face, the fruit can help reduce inflammation and clean pores. Plus, it can stimulate the growth of collagen and elastin -- proteins that keep your skin looking young, shows a study in the journal Phytotherapy Research.
To reap the skin-soothing benefits of avocado, try Conte’s favorite exfoliating mask: Mash together one avocado (cut into pieces), the juice from half a fresh orange, 1 teaspoon fresh lemon juice, and 1 teaspoon extra-virgin olive oil. Spread evenly on your face and neck, leave on for 30 minutes, and then wash off with cold water.
After all traces of your mask are removed, a toner can help hydrate your skin and seal in moisture. To make sure you don’t overdo it, apply toner to a tissue folded into quarters, and then wipe the tissue across your face for an even application.
DIY Spa Day Step No. 4: Make a full-body exfoliant.
“When my skin is feeling dry or rough, I like to scrub it with a mixture of almond oil, sea salt and a drop of lemon oil,” says Conte. Make sure to use sea salt (not iodized salt) with small granules so it doesn’t scratch your skin, and mix with oil until you get a grainy, spreadable consistency.
Don’t have lemon oil at home? Cut a lemon in half and use it as your loofah: The citrus acts as a natural exfoliant to help slough away dead skin cells. Apply to arms and legs while you’re standing in or sitting on the edge of the bathtub; afterward, rinse off with warm water.
DIY Spa Day Step No. 5: Put your best foot forward. A professional pedicure involves more than just painting your nails, but that doesn’t mean you can’t duplicate the process at home. Fill your bathtub with warm water and a soothing bath salt, and let your feet soak as you remove any polish that’s currently on your toenails.
Cut or file your nails straight across, rounding the corners only slightly to avoid ingrown toenails, says Conte. Then apply cuticle oil to your toes and use a cuticle stick or a nail file to gently push back your cuticles. “Be careful here, because you’re not a professional,” she says. “Pushing too deep, or cutting or peeling off skin, is how you can end up with scabs or an infection.”
Next, exfoliate the bottoms of your feet with a pumice stone or a loofah, allowing the other foot to soak. Then, drain the tub and apply a thick lotion to your feet. Leave the lotion on for at least five minutes, then rinse your feet with fresh water and dry them off. Now for the color: To help separate your toes, twist up several tissues and wrap them around your toes, creating space between them. With a steady hand, apply two coats of color followed by a quick-drying top coat.
Leave the tissues between your toes for as long as possible to prevent your nails from rubbing against each other; try to remain still for at least 10 minutes. Use this time to read a magazine, call and catch up with an old friend, or just sit back and enjoy the peace and quiet.
Photo by Camille Brodard ~ Kmile Feminine Creative Designer on Unsplash
Like this article? Get more by following us on Facebook at Beauty & Confidence.
