Beautiful Cuticals: The Ultimate 5 Step Routine

Introduction

Your cuticles play a crucial role in maintaining the health and appearance of your nails. Neglecting them can lead to dryness, hangnails, and even infections. Fortunately, with a little care and attention, you can keep your cuticles looking healthy and beautiful. Let's review a simple five-step routine to help you maintain your cuticles and promote overall nail health.

Step 1: Hydration and Moisturization. The first step in maintaining healthy cuticles is to keep them hydrated and moisturized. Apply a cuticle oil or a moisturizing cream to your cuticles daily. These products help prevent dryness, cracking, and splitting, while also nourishing the skin around your nails. Massage the oil or cream into your cuticles and nails for a few minutes to improve blood circulation and enhance absorption. Regular hydration and moisturization will promote healthy nail growth and prevent the formation of painful hangnails.

Step 2: Gentle Cleaning. Regular cleaning of your cuticles is essential to remove dirt and debris that can accumulate around the nail bed. However, it's crucial to be gentle to avoid damaging the delicate skin. Use a soft, damp cloth or a cuticle stick to gently push back the cuticles after a warm bath or shower when they are soft. Avoid cutting or trimming your cuticles too aggressively, as this can lead to infections. Stick to gentle cleaning techniques to maintain their health and integrity.

Step 3: Nail Care Tools. Investing in high-quality nail care tools is crucial for maintaining your cuticles. Choose a pair of stainless steel cuticle nippers or scissors for precise trimming when necessary. Ensure that your tools are clean and sterilized before use to prevent the spread of bacteria. Additionally, use a crystal nail file or a gentle buffing block to shape and smooth the edges of your nails. Remember, regular maintenance and the use of proper tools will help prevent cuticle damage and promote healthier nails.

Step 4: Protection. Protecting your cuticles from harsh chemicals and excessive moisture is vital. When engaging in household chores or using cleaning products, wear gloves to shield your hands and nails from harmful substances. Moisture can also weaken your cuticles, so avoid prolonged exposure to water. If you need to soak your hands, use lukewarm water and limit the duration. Afterward, gently pat your hands dry rather than rubbing them vigorously, as friction can cause irritation.

Step 5: Balanced Diet and Supplements. Maintaining healthy cuticles goes beyond external care; it also involves nourishing them from within. A balanced diet rich in vitamins and minerals is essential for promoting overall nail health. Include foods like lean protein, fruits, vegetables, and whole grains in your diet. Additionally, consider incorporating supplements such as biotin, vitamin E, and omega-3 fatty acids, which can contribute to stronger nails and cuticles. However, consult with your healthcare provider before starting any new supplements to ensure they are suitable for you.

Taking care of your cuticles is an essential part of maintaining overall nail health. By following this five-step routine, you can keep your cuticles looking healthy, supple, and beautiful. Remember to hydrate, clean gently, use appropriate tools, protect them from harmful substances, and nourish them from within. With consistent care and attention, your cuticles will become a source of pride, enhancing the appearance of your nails and boosting your overall confidence.
 

Best Waterproof Eyeliner

We have all had the same terrible feeling at some point, when an otherwise perfectly drawn cat-eye eye line application gets ruined by smudging onto our upper eyelid. What’s worse, the water proof or smudge-proof eyeliner we thought we’d bought has let us down, again. It doesn’t last long enough or it can’t handle any blinking.  It is annoying and frustrating, and it happens to all of us best of us. But, you can minimize these eyeliner mishaps by using a truly waterproof product that works! And if you thought it sounded too good to be true and that they don’t exist, well they do and they work great. We’ve tested them out and have a our list of best waterproof eyeliner here for you.


Patrick Starr

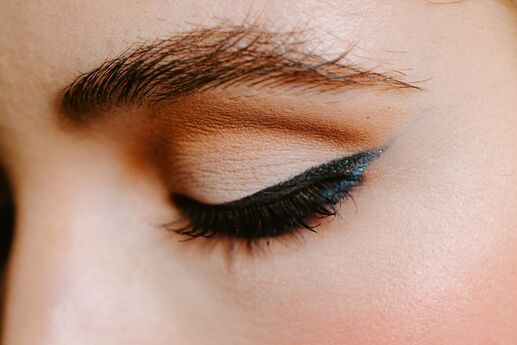
Patrick Starr knows his stuff when it comes to waterproof liquid eyeliner. This One/Size liquid liner goes on very smooth, has a very rich matte finish, and won’t smear or run after application. The elongated tip allows for extra attention when going for a distinct eyeliner finish, and will inspire you to get creative with your application. It also very durable, and will last all day and on into the night without faltering, and can be used as a supplement to other primer and eye shadow products.

You can find it here.


Dior Diorshow

This eyeliner comes in three different finishes: pearlescent , satin and matte.  And with its array of different colors, it is no wonder this one made our list. Dior liquid liner provides amazing flexibility for serious eyeliner artists, and it is easy to use.  At over $30, Dior is a little pricier than other liquid liners, but we think it is well worth it. Still, it is a bit of spurge, so keep it in your kit and break it out when you really want to stay dry and make an impression. We love the felt tip and its ability to create sharp, crisp lines and fun designs.

Buy it here on Amazon


Kevyn Aucoin Liquid

This liquid eyeliner is as black as my morning coffee (even blacker!) and this one delivers on its water proof promise. Some liquid eyeliners don’t work when drawn over eyeshadow or base, especially the ones with a satin finishes. But by using a series of short, smaller dashes or slashes instead of one single continuous line, you can help create the cat-eye effect without compromising the line.

Buy it here on Amazon


Kulfi Pencil

Sometimes the ink just doesn’t work for you, and if you’re one of those people who prefers the pencil, then the Kulfi is worth a shot. It is super soft, goes on smoothly and looks great. And, it is smudge proof, water proof and comes in a lot of great looking colors. Some added vitamin E and aloe vera feels great on your skin, and you won’t need any stretching or pulling to make it go on right. You will love this soft and versatile pencil liner.

You can find it here.


Killer Liner Gel Pencil

A must-have for any makeup enthusiast, this water-proof eyeliner is incredibly easy to use and glides on smoothly, making it perfect for creating a variety of different looks. The gel formula is rich and pigmented, providing a bold and intense line that lasts all day, without any smearing or smudging. The pencil is also incredibly versatile, allowing you to create anything from a subtle, natural look to a dramatic, smoky eye. One of the things I love most about this eyeliner is that it doesn't smudge or smear, even on my oily eyelids. I also appreciate that it's waterproof and long-lasting, so I don't have to worry about touch-ups throughout the day. The fine tip of the pencil allows for precise application, making it easy to create a sharp and defined line.

Buy it here on Amazon


Photo by Taylor Heery on Unsplash

Make-Up Application Techniques and Tips

Finding the right shade and tone for your face and your look requires practice. And as the saying goes, practice makes perfect, so put in the time and effort now so that when that big event comes up, you know what to do. This will save time for you hair and outfit.

New Things to Try

If you want your makeup to look a certain way or you just want to experiment, now is the perfect time to do it. Maybe you want to try a more complicated eyeshadow look, or you want to try to make an ombré lipstick. Here are some things you could try while at home:

Eyeshadow & Eyeliner

Even the experts are still learning how they can improve their eyeshadow and blending skills. It is okay if you don't get the exact look you want your first try. Eyes are the hardest part of a general makeup routine. The most common form of eyeshadow is in a powder form. Powder eyeshadows usually include mattes, shimmers, metallics, foils, glitters, and duo-chromes. Other forms may include creme or liquid eyeshadow. If you are new to makeup, maybe use some neutral shades, and maybe a shimmery bronze shade to put on your eyelid. If you are more experienced in the world of makeup, maybe try doing eye looks with more vibrant colors, or perfecting the art of eyeliner. You could try doing a pink eyeshadow look without looking sick, a cut crease using concealer or a smokey eye. Or you could learn to do eyeliner in your waterline, or winged eyeliner using a liquid formula. The possibilities for eyeshadow experiments are endless. No matter how experienced you are in makeup, blending is the key ingredient to a flawless eyeshadow look.

Foundation/Base

Foundation is called "foundation" for a reason. It is the foundation of your makeup. Foundation is supposed to make your skin look flawless and perfected, followed by concealer. The two main forms of foundation are creme (which usually comes in a stick component) or liquid. Both can be blended out with a beauty sponge or a brush. You want the foundation to be properly blended into the skin, so that it doesn't look cakey. Do not get foundation to make your skin look lighter or darker. When buying your foundation or concealer, make sure that it doesn't oxidize or look a different way on your skin after some time that you don't like or doesn't look good. Keep in mind of what undertone you are as well, whether you are cool-toned or warm-toned.

Lips

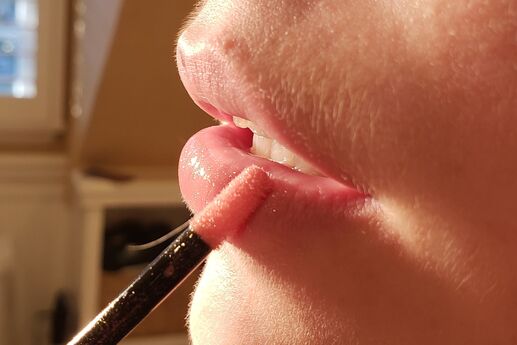
Your lips are a very important part of your makeup. They can determine what kind of look you are going for, and they can come in all types of forms. Since 2014, many makeup brands have put out a Liquid-to-Matte lipstick formula, which have become permanent products in lots of peoples' makeup kits. But some people don't like the drying feeling of a Matte Lipstick or Liquid Lipstick, so they might resort to lip gloss, lip liner, or a creme lipstick. Another very popular and unique Liquid Lipstick formula is the Kylie Cosmetics Velvet Liquid Lipstick, which doesn't dry down to a matte texture, but feels more creamy on the lips and is less drying. Now is the perfect time to find out what is your favorite type of lipstick, and you have a lot of choices. You may want to try a lip liner with a matching lipstick or lip gloss. You could wear a lip that you would never wear out in public, just to get some use out of it and see if you like it. Or try a lipstick with a darker lip liner, topped by a glittery pigment or gloss to create an ombre lip. Or, you could simply just practice applying the different types of lip products. Maybe try out a lip scrub as well and add it to your everyday life.

Contour/Bronzer

Lots of people like to look very tan when they wear makeup, but instead of going to the tanning salon, they have a home remedy to make them look tanned by the sun. There are three types of contour: liquid, creme, and powder. When it comes to the liquid contour, many people just use a darker concealer shade and apply it straight to the face, and then blend it out with a brush or sponge. Creme contour sticks are very popular in today's makeup world. You simply just apply the product to your face and then blend it out. Simple as that. Some people might get powder contour and bronzer mixed up. When you contour, the idea is that your face looks chiseled and defined, and bronzer makes you look tanner. Sometimes, someone will have a darker contour shade underneath their bronzer. If you don't know where you are supposed to contour, here are some tips: lots of people use the "3" technique, where they make a "3" shape on the side of their face. The top of the three is on your forehead, the middle just underneath your cheekbone, and the bottom on your jawline. Most people use a brush to do this technique. Another way of applying contour or bronzer is to just apply it underneath the cheekbone. Some people also contour their nose to make it look a certain way, or their lips so that they look bigger. With contour, the most important thing to remember is to contour your face to fit your face, not the way you see it in every YouTube tutorial.

Blush/Highlighter- Blush and highlighter are some of the fun and easier parts of a general makeup routine. Just like contour, they can come in multiple forms such as creme and powder. Some people even like to use lipstick as a blush and lightly dab it on their cheeks. Blush is applied to the apples of the cheeks to give a rosy hue. Blush is applied with a brush shaped to fit the cheek. Highlighter comes in creme, liquid, and powder forms. While some people like a subtle glow, others like blinding highlighters that look like mirrors on their face. You usually apply highlighter to the cheekbones, nose and on the Cupid's Bow on the lips to give a nice (or insane!) glow to the face. Use a brush to apply highlighter, but if the color or pigmentation is too intense for you, just go over it with a beauty blender.

Like this article? Get more by following us on Facebook at Beauty & Confidence.


Stay at Home Make-Up Tips

Most of us are now into April with stay-at-home orders still in effect due to the global health crisis. Stuck inside for a month now, we've come up with all sorts of activities to do to keep us busy and stave off the boredom like as as playing cards, streaming video, doing puzzles, or consuming way too much social media. But just like any other skill, if you're looking to perfect your look for when the health restrictions are lifted, practice makes perfect. So why not get our your pallets out and spend a couple of hours getting you ready for you first outing when the stay-at-home order are lifted? Supplies can easily be ordered online, so no need to worry about running out of base or foundation and liner while you practice you technique. Just don't use too much toilet paper for clean-up!

Here are a few tips for a fun makeup practice session:

Find a good Spot to Work

A good mirror and good lighting are the keys to properly applying makeup. The bathroom usually has good light, so that is a good option. Or, if you have a dedicated makeup station in your room with a good mirror and a place for your supplies, then do it there. You want a place where you can work quietly and effectively.

Set the Mood

Sometimes listening to your favorite podcast or music playlist can get your creative juices flowing. You phone and decent speaker are great tools you can add to your makeup kit. Just make sure the batteries are charged up! Some people find doing their makeup and skincare therapeutic. If you are doing your makeup in the morning, maybe have a cup of coffee or tea. Maybe even FaceTime, Zoom, or call a friend or family member to get feedback and opinions.

Make Sure You Tools are Clean

Clean brushes are always a great way to start a practice session, so make sure your makeup kit is in order and your brushes are clean and you products are not broken or expired. To tell if your products are expired, simply smell the product. If it smells odd, then maybe it is time to throw it out. Also, check the expiration date on the component or the outside package. There should be a little container symbol that will tell you how long it lasts (example: 12 months).

When pandemic and health crisis over, we'll have regrets about not getting six-pack abs or writing a novel, so don't waste this valuable opportunity. You've got some extra time on your hands, put it to good use by working on your make-up skills!


The Secrets to Smudge-Proof Makeup

All too often, I catch glimpses of women with unknowingly smeared lipstick and raccoon-like eye makeup on the street. Hey, it happens -- but it doesn’t have to! As a makeup artist for Good Morning America, it’s my job to make sure the anchors and reporters look perfect from the show’s start to finish. With those hot studio lights and high-pressure scenarios, it’s a challenge to make their makeup smudge- and budge-proof.

Over the years, I’ve learned a few tricks that really work. With these following tips, you’ll look flawless for hours.

1. Choose the right foundation.
Finding the right foundation that won’t look caked-on after a few hours is essential. The best product depends on your skin type. Experiment with drugstore concealers to find the right one. Sephora-brand concealers are also dependable. They come in a variety of shades for all skin tones and rarely require reapplication throughout the day. I like how they sink into the skin, leaving a nice, natural look.

2. Finish with translucent powder.
Television anchors are constantly under bright studio lights. My trick for keeping them shine-free: I use a translucent powder, which leaves skin with a matte finish. I recommend doing a touchup through the course of a day. Use a facial tissue to gently blot the skin and remove excess oil. Then reapply the translucent powder.

3. Go waterproof.
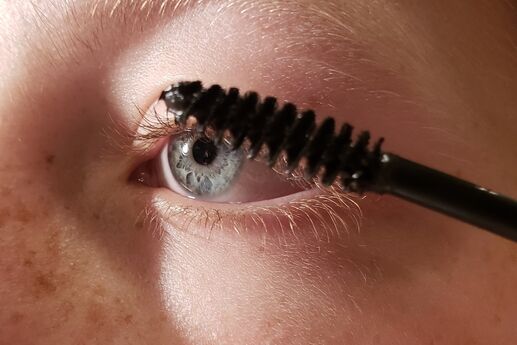
How often have you looked in the mirror to see smeared mascara or a black under-eye smudge? To prevent this from happening, use waterproof mascara. Some can leave your eyelashes looking brittle or clumpy, so test out a variety of brands.

4. Prime your lids and lips.
Creased, smudged eye shadow is one of the biggest beauty blunders I see. But one simple step can prevent this from happening: First, prime your lid with concealer. Without a primer, the makeup has nothing to hold onto -- and the natural oils in your skin will cause it to slide off and crease. So gently dab a little concealer onto your eyelid before applying any eye makeup.

You can also use this same trick for your lips. Using a finger, blend your concealer right onto your lips. If you find that this causes your lip color to look too light, try filling in your entire lip with a natural-colored lip liner. Then blot with a facial tissue before slicking on your lipstick.

Photo by Angelos Michalopoulos on Unsplash