5 Steps to Blemish-Free Healthy Skin

Thought those embarrassing breakouts would go the same way of teenage angst and strict curfews? As it turns out, adult acne is becoming increasingly common. According to a recent report from the American Dermatological Association, nearly half of women in their 20s and one in four women in their 30s battles clinical acne.

In many cases, these breakouts are caused by different triggers now than in your teens. “Our skin is an eliminating organ, which often acts up when the body is out of balance,” says Tammy Fender, an aesthetician and the founder of Tammy Fender Holistic Skin Care. “So we may need to make a few changes with our emotions, diet, or lifestyle.” Ready to finally give those blemishes the boot? Start with these simple changes so you can finally get that clear, glowing complexion:

Healthy Skin Step No. 1: Eat more fruits and veggies.
To clear up your skin, you have to clean up your diet. One study published in the Journal of the American Academy of Dermatology showed that people who ate a diet high in sugar and refined carbs (foods high on the glycemic index) were more acne-prone than those who dined on healthier meals. After they started eating more produce, whole grains and lean protein, their complexions significantly cleared up.

“Your skin is nourished by the nutrients that you consume,” explains Fender. In fact, British researchers show that adding three more servings of produce to your diet can make a visible improvement to the quality of your skin within six weeks.

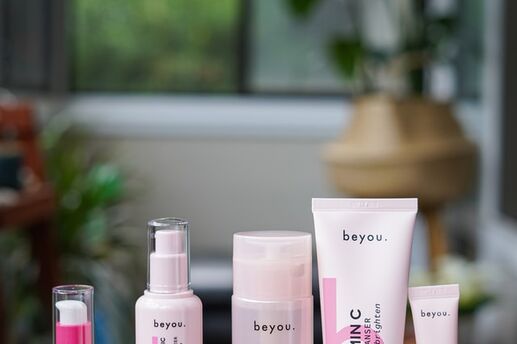
Healthy Skin Step No. 2: Clean with gentle products.
When you’re trying to zap a zit, it’s tempting to reach for the most powerful products in the drugstore. “But these harsh ingredients can aggravate the skin,” says Fender, who recommends looking for those made with natural anti-inflammatories like thyme and tea tree.

The American Dermatological Association advises washing with a mild cleanser twice a day, and opting for a non-clogging moisturizer daily. If you opt for a drying product or zit cream, apply only a thin layer -- using more than recommended will only aggravate your skin.

Healthy Skin Step No. 3: Be diligent about makeup removal.
Your makeup can clog your pores, paving the way for a breakout. So clean your face each night. “I recommend taking off your makeup as soon as you can, like first thing when you get home,” says Fender.

One of her favorite makeup products is jojoba oil, which removes stubborn products without leaving an oily or greasy feeling. Simply put the oil on a cotton pad or facial tissue and wipe away any makeup before washing your face with a gentle cleaner.

Healthy Skin Step No. 4: Stress less.
Research from Wake Forest University shows that stress causes your skin to produce more oil, which can trigger pimple production. So no matter how hectic your day is, make sure to set aside some time to relax: Go on a solo walk, do a yoga DVD or simply take a few deep breaths.

Healthy Skin Step No. 5: Don’t wage war on that pimple.
“Treat breakouts as you would a wound,” advises Fender. That means avoiding picking, squeezing or jabbing at that zit, which can introduce more bacteria and make matters worse.

Instead, she recommends treating the blemish with an antiseptic product, like her Tammy Fender Clarifying Dermagel. “It’s made with myrrh, thyme and tea tree, which battle bacteria and help to oxygenate and heal the skin,” she says.

If over-the-counter products don’t work on your skin, you may want to consult a dermatologist.

Photo by Richard Jaimes on Unsplash

Like this article? Get more by following us on Facebook at Beauty & Confidence.

6 Pro Beauty Products

Most of us have our favorite beauty staples: foundation, blush, and mascara. But it’s time to introduce a few new items into your repertoire. As a makeup artist, I deal with hundreds of different cosmetic products -- but I always find myself relying on a few surprising ones.

Consider adding the following products to your beauty regimen. They may seem simple, but they’ll make a huge difference!

1. Exfoliating products.
Large, clogged pores are my beauty arch-nemesis. For a smooth complexion, I use a micro-exfoliation wash, mask or cloth to strip away excess dirt and oil. Choose a gentle product that isn’t too harsh on your complexion. My rule of thumb: If the product feels like it’s scratching your skin, toss it.

2. Antiaging serum with vitamin C.
Known in its pure form as ascorbic acid, vitamin C lightens dark spots and softens fine lines. I prefer serums with rose hips, which are high in the vitamin. To apply it, put a reasonable amount in your palm, rub your hands together and pat your face, neck and décolletage. Then softly drape an unfolded on your skin to absorb the excess. Tip: If your product turns a different color, like yellow, that means it’s lost some of its benefits -- and it’s time to buy a new bottle.

3. Primer.
Several of my clients complain of having red splotches or sallow complexions. Tinted primer is the remedy to these problems. Remember the color wheel from art class? Opposing colors can neutralize one another: Green balances out red, and violet counteracts yellow.

Choose your tinted primer and prep your skin with moisturizer. Using a flat foundation brush, paint the primer on your face, focusing on the areas that need color correction. Dab off any streaks with a and apply your foundation as usual.

4. Nude eyeliner.
When all the concealer in the world is not enough to make me look awake, I brighten my eyes with a flesh-toned eyeliner. Choose a waterproof pencil one or two shades lighter than your skin. (Even if you’re pale, stay away from stark white liner. They can create a chalky look.) Sketch the color across your waterline -- the innermost rim of your lower eyelid -- brush on your mascara, and your eyes no longer look like they’re begging for an espresso.

5. Paintbrushes.
Mixed in with my pricey top-of-the-line makeup brushes, you’ll find several art store paintbrushes. Great for lipstick, eyeliner and under-eye correction, many of these brushes are made from the same synthetic fibers as their more expensive makeup counterparts. Some of my finest and most precise eyeliner brushes are actually meant for oil or acrylic paints and cost half as much as the less effective ones sold by beauty suppliers!

As with all brushes, washing is essential. Use a mild shampoo to scrub off any residue and makeup and rinse. Then press the brush into a folded to remove as much water as possible. Shape the brushes and lay them out to dry.

6. Cream shadows.
For years, cream shadows have been my No. 1 necessity. These products provide long-lasting coverage, so there’s no need for a specific eye primer. Plus, they have pigment that blends well with powder shadows.

How to apply it? Spread a light peach-pink cream shadow over your lid, V area and crease. Before the product dries, dust your lid with a lighter matching shadow. You can keep it simple or go more dramatic by highlighting the center of your lid with a pearl shimmer, then add a darker shadow to your V area and crease. Wipe away any smudges or excess.

Photo by Alexandra Tran on Unsplash

Look Gorgeous During Allergy Season

Ah, spring. It’s a season filled with balmy weather, budding trees and -- for allergy sufferers -- a disheveled appearance. All too often, you’ll dress up for an outdoor concert or picnic only to return home with a red nose, under-eye circles and a pocket full of tissues.

If you’re one of the 35 million Americans who battles seasonal allergies, there’s no need to become a springtime recluse. The following tips will help you ease those symptoms, so you can look fantastic all season long.

1. Cover up.
Allergies can cause dark circles to form beneath your eyes. To look awake and fresh, use a concealer that matches your skin type. Dab it on with your finger and use a facial tissue to remove any excess product. Keep an extra concealer in your purse so you can apply touch-ups on the run.

2. Look like Jackie O.
Before you head out of the house, put on a pair of wraparound shades. Not only do they cover up the dark circles, but they’ll also block pollen from entering your eyes.

3. Minimize your makeup.
During allergy season, some tears are inevitable. Make sure you use waterproof makeup, or go for a minimal look: Stick with tinted moisturizer or BB cream, concealer, blush and lipstick -- and skip the heavy eye makeup, which can run. Also keep a pack of tissues in your purse to wipe away smears and tears.

4. Pick soft tissues.
Constantly wiping and blowing your nose irritates the skin, creating a red Rudolf-like effect. Look for a soft facial tissue with lotion that’s gentle on your nose. And dab lotion on your nose throughout the day.

5. Drink up.
Being dehydrated causes blood vessels to get bigger, which can lead to an even puffier face. Drink a glass of water first thing in the morning and carry a reusable water bottle with you to make sure that you’re getting enough fluids.

Photo by Gabriel Silvério on Unsplash

Like this article? Get more by following us on Facebook at Beauty & Confidence.

Get a Fresh Face for Spring

Life doesn't stop when you're feeling under the weather. That's especially true for television: Even if an anchor or reporter is battling a cold or allergy symptoms, the show must go on. As a makeup artist for “Good Morning America,” it's my job to cover up those telltale red noses and blotchy spots.

So the next time you're sick or suffering from allergies and have to face the world, try using a few of my tried-and-true tricks that’ll make you look fabulous!


1. Brighten sallow skin.
For a fresh complexion, wash your face with an exfoliating scrub to slough off dead, tired-looking skin cells. Don't have any scrub on hand? Try making your own by mixing coffee grounds and full-fat milk. The caffeine (which has popped up in plenty of skin care products) acts as an anti-inflammatory, tightening your pores and shrinking visible blood vessels.

2. Disguise a red nose.
Continuously blowing your nose can leave your skin dry and chapped. Be gentle on your nose by using only soft tissues, like those with lotion, and applying moisturizer regularly. Skip the petroleum jelly on your nose, though, since it can clog pores and lead to breakouts.

To mask the redness, apply a layer of foundation. A cream-based kind will give you an even skin tone, without that caked-on appearance. Using your finger or a makeup sponge, dab some concealer to cover up any remaining ruddiness on your nose.


3. Clear up tired eyes.
When the anchors come in at the crack of dawn, I often reach for eye-whitening drops, which mask tired, bloodshot eyes. One warning: Since the drops I prefer to use are tinted blue, I always make sure to have a tissue on hand to wipe up the excess moisture after use.

For dark under-eye circles, use a concealer with orange undertones. Steer clear of violet or purple eye shadow when you're sick or exhausted; the shade will draw attention to those purplish under-eye circles, making you look even more tired.


4. Moisturize chapped lips.
Slough off dead skin with an exfoliating scrub formulated for lips, or make your own by mixing sugar with a dab of olive oil. Rub the concoction on your lips, wipe it off and dab on some lip gloss or balm for a healthy-looking smile.

5. Clear your voice.
If you're meeting with clients or presenting to a group, the last thing you want is to sound congested. So try an over-the-counter decongestant, which helps temporarily clear up the gunk in your nose. Also sip some hot tea with lemon and honey, which can help soothe your throat and ease that husky voice.

6. Brighten up.
For a finishing touch, brush a little pink blush on the apples of your cheeks. Being sick can drain your face of color -- the blush will add a natural rosy glow. So even if you feel like crawling into bed, you'll still look energized.

Photo by Dmitry Vechorko on Unsplash

Like this article? Get more by following us on Facebook at Beauty & Confidence.

5 Ideas for a Romantic Look

There’s no better time to get flirty than on Valentine’s Day -- especially when it comes to your hair and makeup. Soft waves, dewy skin and rosy cheeks create a dreamy, romantic look that’s perfect for the evening, whether you’re planning a big night out or intimate dinner at home. Try the following tips for makeup application to score a look you’re both sure to love.

1. Make some waves.
You can’t go wrong with loose, bohemian waves. Start by working volumizing mousse onto damp hair and blow-drying completely. (If you’re short on time, sprinkle dry shampoo, such as Oscar Blandi Pronto Dry Shampoo, on your roots.) Wrap small sections of your hair around a curling iron, only using the middle part of your strands; keep the iron away from your roots and ends. Repeat until you’ve curled all of your hair, then gently brush out and set with hair spray.

Want to wear your hair up? Show off your neck and shoulders with with a romantically undone ‘do. First, curl dry, unwashed hair with a large-barrel curling iron. Then pull your hair into a loose ponytail at the nape of your neck or to one side, and secure with an elastic band. Twist hair around the band until it forms and bun and secure with bobby pins.  Run your fingers through your hair for some wispy face-framing pieces and finish off with hairspray. For an extra touch, add a pretty headband.

2. Go light.
To achieve a gorgeous glow, skip heavy cream-based foundations. Instead, lighten up your look with an illuminating sheer liquid foundation, such as Stila’s Illuminating Liquid Foundation. Then dab on the concealer only where needed, and set with a translucent powder. To remove excess product, blot with a facial tissue.

3. Try a twist on the smoky eye.
Trade in your usual black or charcoal eyeliner for a pop of color, like emerald green, deep plum or navy blue. To apply, smudge the eyeliner along the top and bottom of your lashes; you want an uneven, soft look. Wrap your forefinger in a facial tissue, and swipe away any excess beneath or in the inner corner of your eye.

For an extra pop, dab a little white eye shadow in the inner corner of your eye or add a subtle gold liner just above the top lash line (apply on top of the colored liner). Keep the rest of your makeup neutral -- and all eyes will be on you!

4. Look pretty in pink.
In the beauty world, going match-matchy is usually a don’t. But the romantic look is an exception to this rule: Soft pink lips and cheeks create a super-dreamy appearance.

To avoid going overboard, apply the blush only to the apples of your cheek. Then add a touch of bronzer along the edges of your face: On each side of your forehead, a sideways “W” motion from the edge of your forehead to the cheekbone, and then from your cheekbone to the side of your jawline.

5. Get soft, dewy skin.
A simple trick for come-hither skin: Apply moisturizer before and after you put on your makeup. (You heard me right -- after!) Like to a topcoat of nail polish, lotion sets your look and adds a little glow. Pat, don’t rub, a little drop of moisturizer on your cheekbones, T-zone and chin -- and you’ll look gorgeous all evening.

Photo by Jose Martinez on Unsplash

Get more by following us on Facebook at Beauty & Confidence.