Cold Tips: Should You Exercise When You’re Sick?

Search “cold remedies” online, and more than 35 million results pop up. But it turns out that one of the most effective ways to beat the sniffles is also the simplest: Get moving! According to a recent study published in the Annals of Family Medicine, people who walk for 40 minutes a day take half as many sick days as their sedentary counterparts. That’s because exercise bolsters the immune system, which helps you fight off viruses, say experts.

But when you finally succumb to those sneezes and coughs, is it smarter to soldier on or toss in the sweat towel? To help you decide, here’s what the experts have to say about staying healthy: 

Cold tip No. 1: Do a neck check.
If you have symptoms below the neck, such as chest congestion, diarrhea or body aches, or if you have a fever, stay home to rest. Your body needs all of its energy to recover.

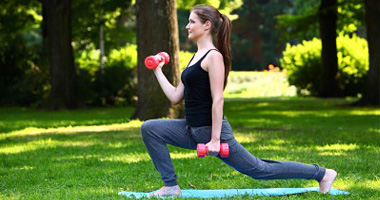
But if you just have a head cold (runny nose, sneezing and a sore throat) and you’ve been fever-free for 24 hours, go ahead and exercise if you feel up for it. But dial down the intensity: Instead of your usual run or group cycling class, opt for yoga or a restorative walk. And stash a few tissues in your pocket in case you need to wipe your nose mid-workout.

Cold tip No. 2: Wipe down the gym equipment.
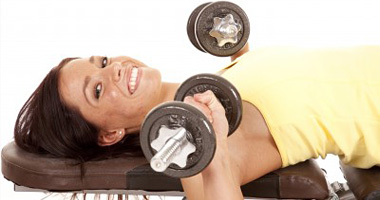
A study of fitness centers published in Clinical Journal of Sports Medicine revealed that 51 percent of aerobic machines and 73 percent of strength-training equipment were infected with cold viruses. Before you hop onto that elliptical or grab those dumbbells, wipe it down with an antibacterial wipe. Don’t have one on hand? Ask the gym staff to spritz some cleaner on a few tissues, and use a towel to cover benches and mats.

Also wash your hands thoroughly before and afterwards, and make a conscious effort to avoid touching your face during your workout.

Cold tip No. 3: Ease back into your routine.
Once you start feeling better, it’s tempting to try to make up for lost time at the gym. But working out full-force may lead to a relapse: Scientists from Canada’s McMaster University found that intense exercise can actually impair immune function, which can prolong your cold and leave you vulnerable to another one.

A smarter move: Start out with moderate workouts to give your body a chance to readjust. If you begin to feel worn down or tired again, stay home to fully recuperate – it could be exactly what the doctor ordered.

Photo by Brittany Colette on Unsplash

Like this article? Get more by following us on Facebook at Beauty & Confidence.


Create an At-Home Gym: Essential Fitness Supplies

What’s keeping you from the gym? Whether it’s job or family obligations, there are plenty of things that can derail your exercise goals. To make workouts as convenient as possible -- and increase your chances of getting them in -- it’s helpful to have some basic and inexpensive exercise equipment on hand at home.

The Essentials
Remember that your workout should include both cardio and strength training. The key to an effective cardio workout is simply getting your heart rate up. Understandably, not everyone has it in their budget to spring for a treadmill or an elliptical machine. Some good options for getting a cardio workout without any major equipment include jogging, jump rope or an exercise video that provides a good cardio workout.

For at-home strength training, pick up these two practical tools:

At-home fitness tool No. 1: Dumbbells. You’ll want a set of heavier ones you can use when working larger muscle groups (like your legs during dead lifts or weighted squats or lunges) and some lighter weights for working smaller muscles (like your shoulders during an overhead press).

At-home fitness tool No. 2: Resistance bands. Look for a stretchy band with a handle at both ends, which can be looped around a secure point or placed beneath your feet. It can be used for a variety of toning exercises.

For example, to do an overhead should press, place one or both feet in the center of the band. Holding a handle in each hand, bring your hands up beside your shoulders and press up, straightening your arms. The amount of resistance you’re working against depends on the tightness of the band: he greater the tension, the harder the exercise.

At-home fitness tool No. 3: A mat. If your workout area isn’t carpeted, you’ll need a mat to provide cushioning for exercises that involve lying or kneeling on the floor, such as sit-ups, crunches and push-ups.

Bonus Equipment
Here are a few of my other favorite tools that can help you add variety to your workouts and challenge your muscles in new ways:

  • Stability Ball: These inflatable balls are great for strengthening your abs and core muscles. You can use them to make basic core exercises, like crunches and planks more challenging because of the instability: Try holding a plank with your forearms on top of the ball and extend your legs straight out behind you. Challenge your core muscles to stabilize you while you work your shoulders by sitting on the ball and doing an overhead press with dumbbells.
  • Sponge Ball: Like a mini stability ball, these smaller inflatable balls are about nine inches in diameter. Want to tighten and tone your inner thighs? Place the ball between your thighs just above your knees and squeeze it tightly as you do squats. For extra burn, hold the squat and pulse your knees together.
  • Medicine Ball: Available in a variety of weights, medicine balls can be used to add resistance to body weight exercises, like weighted sit-ups or lunges with torso rotation. You can also use them to build upper body power and strength by throwing and catching them -- either straight up in the air or back and forth with a partner.
  • Foam Roller: Like getting massages? This is a much cheaper alternative that provides similar benefits for your muscles. Place this firm foam cylinder underneath a tight muscle or muscle group (like your hamstrings), placing as much of your weight on the roller as possible to add as much pressure as you can tolerate. Roll back and forth over the cylinder to work out knots within tight muscles.
  • TRX: If you’re looking to splurge, this suspension training system costs around $200 and consists of two long straps that you attach to a stable surface, like a doorframe. Using your own body weight and gravity as resistance, you can do hundreds of different exercises by holding the handles or placing your feet in the foot cradles. These exercises work your entire body and great for building strength (especially in your core) and improving balance and flexibility.

Don’t have any equipment at home right now? Try this quick and effective equipment-free workout.
 

Photo by Alexandra Tran on Unsplash

Like this article? Get more by following us on Facebook at Beauty & Confidence.


Strength Training for Women: 5 Exercises to Look Lean & Toned

You’ve done the cardio and counted calories, but you still haven’t seen the results you want. What gives? It may be a lack of iron -- that is, of the dumbbell variety. As it turns out, dieting and cardio alone won’t change your shape. Chances are you’ll lose muscle, slowing down your metabolism. That’s why strength training for women is so important.

When you gain muscle, you gain a lot -- more benefits, that is. Not only does hitting the weight room fend off flab, but it also protects against a variety of diseases, like heart disease and osteoporosis. And just 30 minutes of lifting of day can slash the risk of diabetes by as much as 34 percent, according to a recent study published in the Archives of Internal Medicine. Other added bonuses include decreased blood pressure, improved sleep and enhanced balance and coordination.

More muscle mass also translates into a faster resting metabolism (the baseline number of calories you burn throughout the day). So even at rest, you’re incinerating extra fat.

In spite all of the benefits, many women still avoid weight room. Intimidated or not sure where to start? I’ve got you covered. The following basic, effective routine is simple and easy to learn. Plus, it only takes 20 to 30 minutes from start to finish.

Worried about getting too pumped? Don’t be. Women lack the testosterone levels necessary for building bulky muscles. Instead, look forward to looking toned and lean.

Strength Training for Women: The Workout

After warming up with five to 10 minutes of light cardio, do 10 to 12 reps of each exercise -- this counts as one set. Rest for 30 seconds, and repeat for a second set. Aim to do the workout two or three times a week.

I recommend using 5- to 8-pound dumbbells. (If that’s too hard, use just your body weight to start.) Reach for heavier weights as you get stronger.

1. Step Up
Start: With dumbbells in hand and arms at the side of your body, face a bench or step.

Movement: Lift your right knee and place your foot on the bench. Push your body up. Your left leg will hang straight behind you and won’t touch the bench. Pause at the top while squeezing your glutes. Lower down to starting position. Finish your reps before switching to your left leg.

2. Forward Lunge
Start: With dumbbells in hand and arms at the side of your body, stand with feet hip-width apart.

Movement: Step forward with your right leg and slowly lower your body until your right knee is bent at least 90 degrees. Be careful not to let your right knee extend past your toes. Push back to starting. Complete all reps and then repeat with the left leg.


3. Dumbbell Row
Start: Hold dumbbells with your arms in front of your body, palms facing toward you. With feet hip-width apart and knees slightly bent, bend forward at your hips and lower your torso until it's nearly parallel to the floor. Allow your arms to hang from your shoulders, palms facing your legs.

Movement: Bend your elbows and pull the weights up toward the sides of your torso. Pause and pull your shoulder blades together. Lower the weights back to start and repeat for all reps.

4. Dumbbell Chest Press

Start: Lie on a bench with your feet flat on the floor (or on the bench if you can’t reach). Hold a dumbbell in each hand on either side of your chest. Keep your elbows out to the side and upper arms parallel to the floor.

Movement: Push the weight up till arms are extended. Pause and lower back to start.

5. Plank
Start: Starting from a pushup position, bend your elbows and lower down until you are resting on your forearms. Your body should form a straight line.

Movement: Engage your abs (think of pulling your belly button towards the ceiling) and hold your body in a straight line for 30 to 60 seconds. Don’t allow your hips to drop or your butt to rise up. Rest and then repeat for a second set.

Main Photo by FitNish Media on Unsplash

Like this article? Get more by following us on Facebook at Beauty & Confidence.