The Art of Makeup Touch-Ups

Most women apply their makeup in the morning, and then freshen up their lipstick periodically. But taking two minutes to do a quick makeup touch-up a few times throughout the day can make all of the difference: You’ll appear just as polished at 5 p.m. as you did first thing in the morning. Follow my five simple steps to look gorgeous around the clock!

Makeup Touchup Step No. 1: Pack smart.
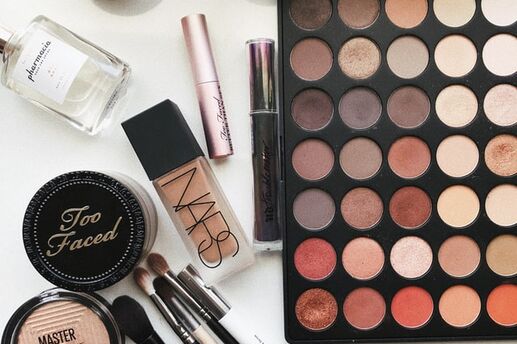
To look your best all day long, toss a touch-up kit in your purse. I recommend tools that have a variety of uses, such as:

• Dual-tipped eyeliner or eye shadow pencil and mascara

• Pack of tissues

• Lip/cheek stain and lip balm

• Makeup wedge and two-sided brush

• Travel bottles of hairspray and dry shampoo

Makeup Touchup Step No. 2: Blot, dab, blend.
At the end of the day, your face gets shiny and your eyelids turn greasy. Your foundation also settles into lines and creases. To smooth everything out, use a tissue as a makeshift blotting paper: Tap (don’t drag) the tissue on your face.

Once you’ve removed the excess oil, fold it until it becomes a wedge. Use one point to clean any shadow or mascara that has fallen beneath your eyes. Dab another corner to blend any concealer that has settled into lines, and use the third point to smooth any eye shadow in the crease of your lid. Then dust a thin layer of powder across your eyelids and beneath the lower lash line.

Makeup Touchup Step No. 3: Groom your brows.
If you often touch your face or have long bangs, your brows may resemble the Mad Hatter’s by midday. To remedy the problem, brush your brows upwards and outwards. Then spritz a little non-flaking hairspray onto the brush and lightly comb the hairs in place.

Makeup Touchup Step No. 4: Lash out.
To freshen your lashes without crossing into Tammy Faye territory, try this tip: Rip off an inch-wide strip of a tissue and roll it into a tight tube. Rub the end of your mascara wand onto the tip of the tube, then whisk it on the roots of your lashes. This paints on a small amount of mascara. As it dries, push your lashes upwards with the tube to help them curl.

Makeup Touchup Step No. 5: Pump up the volume.
Do you locks get oily and limp throughout the day? Try dry shampoo, which soaks up grease and gives your mane more body.

Hold the dry shampoo several inches from your head and dust the roots of your hair with a fine layer. Wait a few minutes, and then rake your fingers through your hair to work the shampoo out. (If there’s any white residue, wrap your index finger with a tissue and flick the powder out.) Finish with one pump of hairspray. The water in the spray cuts the powdery look and sets the shampoo, so you’ll have voluminous locks for the rest of the day.

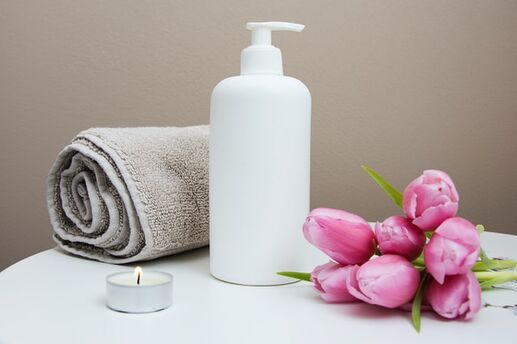
Photo by Victoria Priessnitz on Unsplash

Like this article? Get more by following us on Facebook at Beauty & Confidence.


Your Guide to Winter Skin Protection

In the movies, chilly weather leaves starlets looking rosy and flushed. But in reality, the biting wind, harsh temperatures and dry air can take a toll, leading to an irritated, pasty complexion.

Tired of itchy, chaffed skin? We asked the experts to share their advice on safeguarding your skin from the elements. Here’s what they said.

Skin Protection Tip No. 1: Moisturize the right way.
“In the winter, you may need to swap your normal lotion for a thicker cream that’s more hydrating,” says Maggy Hazard, lead aesthetician for The Spa and Wellness Center at Stowe Mountain Lodge in Vermont. She also recommends using a facial serum. “Apply a thin layer on your neck and face before your lotion or night cream,” she says. “The serum has smaller particles, so it can better penetrate your pores.”

For the best results, rub on lotion immediately after showering. “You want your skin to be slightly damp,” says Dr. Ahmet Altiner, an assistant professor of dermatology at Weill Cornell Medical College and owner of UWS Dermatology & Skin Care in New York City. “The lotion helps lock in the moisture.”

Skin Protection Tip No. 2: Turn down the heat.
Steamy showers feel good, but they can leave your skin feeling parched. That’s because hot water strips the skin of natural oils, says Altiner. Opt for lukewarm showers lasting no more than 10 minutes. Also use a mild soap, like those tailored to sensitive skin.

Skin Protection Tip No. 3: Consider a humidifier.
Your home’s heating system zaps moisture from the air, resulting in Sahara-like conditions. Using a humidifier can help soothe irritated skin, reports a study in the Archives of Environmental Health

Bonus: You’ll also fend off colds and flu in the process. Researchers from Oregon State University showed that the flu virus thrives in dry environments. Adding humidity to the air lowers the odds that those germs will survive for longer periods of time, say the experts.

Skin Protection Tip No. 4: Don’t forget the sunscreen.
Since you’re covered from head to toe, chances are protecting your skin isn’t the first health concern that comes to mind. In fact, 98 percent of Americans neglect to use sunscreen regularly during the winter, according to experts at Ohio State University. But the reality is that the sun is equally strong as in the summer. Plus, the snow can reflect 80 percent of those damaging UV rays, according to the American Academy of Dermatology.

To protect yourself, slather on a product with SPF 30 on any exposed skin (for instance, your face, neck and hands) before heading outside.

Skin Protection Tip No. 5: Reach for the right tissues.
On average, adults come down with two to four colds each year, more often during the winter months than any other time of year. All of those sniffles and sneezes can do a number on your skin, resulting in a red, chapped nose. “That’s why it’s important to invest in soft tissues with lotion,” says Hazard. “They’re gentler.” She also recommends dabbing your nose with a protective ointment, lotion or oil.

Like this article? Get more by following us on Facebook at Beauty & Confidence.


DIY Spa Day: 5 Cheap and Easy Steps

Between work and household responsibilities, chances are you’re in need of some relaxation and TLC. A day at the spa might do the trick. In fact, one study in the journal Complementary Therapies in Medicine found that spa visits were linked to better physical and mental health.

But finding the kind of time and money required for a spa day could cause more stress rather than put you at ease. So instead, set aside an afternoon in your own home and treat yourself to these DIY beauty treatments.

DIY Spa Day Step No. 1: Set the mood.

Your bathroom might be the most practical room for an at-home spa experience, but it also may be the least tranquil. Take a few minutes to get rid of anything that reminds you of household chores, like dirty laundry or stacks of toilet paper.

Then, change into comfortable clothes, light a scented candle and cue up some soothing tunes. According to Australian research, music and nature sounds can help reduce anxiety while increasing relaxation.

DIY Spa Day Step No. 2: Kiss chapped lips goodbye.

What we put on our bodies should be as safe as what we put in our bodies -- especially when it comes to the face, says Lori Conte, a New York City–based beauty expert. “Spa treatments made from food-based ingredients -- like sugar and salt scrubs -- are popular because they’re healthy and all-natural,” she says. “And they’re great for the skin.”

To make an exfoliating (and edible!) sugar scrub for dry lips, try Conte’s recipe: Mix 1 teaspoon of fine castor sugar with 1 teaspoon of sweet almond oil. Gently rub the mixture around the contours of your lips for 30 seconds, then wash off with water and wipe away excess with tissues, which are soft and won’t irritate delicate lip skin.

DIY Spa Day Step No. 3: Go green.

Avocados have antibacterial and antimicrobial properties; when applied to your face, the fruit can help reduce inflammation and clean pores. Plus, it can stimulate the growth of collagen and elastin -- proteins that keep your skin looking young, shows a study in the journal Phytotherapy Research.

To reap the skin-soothing benefits of avocado, try Conte’s favorite exfoliating mask: Mash together one avocado (cut into pieces), the juice from half a fresh orange, 1 teaspoon fresh lemon juice, and 1 teaspoon extra-virgin olive oil. Spread evenly on your face and neck, leave on for 30 minutes, and then wash off with cold water.

After all traces of your mask are removed, a toner can help hydrate your skin and seal in moisture. To make sure you don’t overdo it, apply toner to a tissue folded into quarters, and then wipe the tissue across your face for an even application.

DIY Spa Day Step No. 4: Make a full-body exfoliant.

“When my skin is feeling dry or rough, I like to scrub it with a mixture of almond oil, sea salt and a drop of lemon oil,” says Conte. Make sure to use sea salt (not iodized salt) with small granules so it doesn’t scratch your skin, and mix with oil until you get a grainy, spreadable consistency.

Don’t have lemon oil at home? Cut a lemon in half and use it as your loofah: The citrus acts as a natural exfoliant to help slough away dead skin cells. Apply to arms and legs while you’re standing in or sitting on the edge of the bathtub; afterward, rinse off with warm water.

DIY Spa Day Step No. 5: Put your best foot forward. A professional pedicure involves more than just painting your nails, but that doesn’t mean you can’t duplicate the process at home. Fill your bathtub with warm water and a soothing bath salt, and let your feet soak as you remove any polish that’s currently on your toenails.

Cut or file your nails straight across, rounding the corners only slightly to avoid ingrown toenails, says Conte. Then apply cuticle oil to your toes and use a cuticle stick or a nail file to gently push back your cuticles. “Be careful here, because you’re not a professional,” she says. “Pushing too deep, or cutting or peeling off skin, is how you can end up with scabs or an infection.”

Next, exfoliate the bottoms of your feet with a pumice stone or a loofah, allowing the other foot to soak. Then, drain the tub and apply a thick lotion to your feet. Leave the lotion on for at least five minutes, then rinse your feet with fresh water and dry them off. Now for the color: To help separate your toes, twist up several tissues and wrap them around your toes, creating space between them. With a steady hand, apply two coats of color followed by a quick-drying top coat.

Leave the tissues between your toes for as long as possible to prevent your nails from rubbing against each other; try to remain still for at least 10 minutes. Use this time to read a magazine, call and catch up with an old friend, or just sit back and enjoy the peace and quiet.

Photo by Camille Brodard ~ Kmile Feminine Creative Designer on Unsplash

Like this article? Get more by following us on Facebook at Beauty & Confidence.

Save Money on Your Makeup: 5 Multitasking Beauty Staples

Stroll into any drugstore and you’ll come across aisles full of potions, powders and pencils. Although variety is key, squeezing your entire collection into a makeup bag isn’t possible. So whether you’re trying to pare down your collection, pack for a trip or save a few dollars, consider picking up beauty products that have more than one use.

The following five items are prime examples of multi-purpose makeup. Pick them up (you may even already own most of them!) and use my smart tips for multitasking makeup application.

1. Cream Blush
If there’s one item to stash in your evening bag, it’s cream blush. This little pot covers nearly all of your bases. Besides adding a natural flush to your cheeks, it also works as an eye shadow and lipstick. For a shadow, opt for a dusky or bronze shade. Use your fingers or a small eye shadow brush to swipe it across your lids. Then dab it on your lips with your fingers. Finish with a slick of gloss or lip balm for a creamy, non-clumpy finish.

2. Tissues
Surprise! Your trusty tissue has multiple makeup uses. Stash a to-go pack in your purse to use as blotting papers: Gently pat away excess oil to fend off a shiny complexion. You can also set your lipstick with a tissue.

I also recommend keeping a box in the bathroom or on your vanity to grab as you apply eye makeup. Wrap your index finger in a tissue, and gently dab the lines of your eyeliner for a softer look. Then, at the end of the evening, wet a balled-up tissue with makeup remover. It gently cleans your face without irritating your skin.

3. Mascara
Out of eyeliner? Be a mascara MacGuyver! Dab your eyeliner brush in a tube and use it as liquid eyeliner. You can also use that liner brush to dig out a little of the formula and apply it to a larger shadow brush. Sweep onto the entire lid, below the crease, for a long-lasting smoky eye. Just remember to wash your brush immediately afterwards, since the mascara can dry and cake up.

4. Foundation
Your foundation doubles as a concealer. To mask a blemish or under-eye circle, dip a Q-tip in the cap, where the product’s consistency is thicker. Dab it on and allow it to dry before applying a thin layer of foundation all over your face.

5. Eyeliner
If your eyebrows are a little sparse, use your eyeliner as a brow pencil. Gently flick the pencil to mimic individual hairs of your brows. Then use a spoolie or eyebrow brush to blend the product into your brows.

Photo by Jazmin Quaynor on Unsplash

Like this article? Get more by following us on Facebook at Beauty & Confidence.

9 Essential Skin Care Tips for Oily, Dry and Combination Skin

The path to a perfect complexion is far from one-size-fits-all: what you need to do depends on the type of skin you have. If you’re unsure what category you fall in, do this test suggested by Julie Lindh, a New York-based aesthetician and skin care consultant: “Wash your face and wait a minute before putting on any moisturizer,” she says. If it feels tight all over, you have dry skin. Only tight in a few areas, like your cheeks? You have combination skin. And if it doesn’t feel tight anywhere, you have oily skin.

Once you’ve identified complexion, use the following personalized skin care tips to get glowing.

If your face is oily…

  • Use a powdered sunscreen. “You have to protect your face from the sun, but moisturizing sunscreens can make you look shiny and clog pores,” says Dr. Rebecca Kazin, the medical director of Johns Hopkins Dermatology and Cosmetic Center. A powder sunscreen, which you apply like foundation, provides coverage without adding greasiness -- and you can reapply without messing up your makeup.
  • Blot, blot, blot. “You don’t want to constantly be putting on face powder to conquer shine,” says Kazin. Stash blotting paper or tissues in your purse, and dab your nose, forehead and chin throughout the day.
  • Embrace acid. “Products made with acids can decrease oil production while helping with fine lines, wrinkles, brown spots and acne,” says Kazin. “Use a cleanser that includes salicylic or glycolic acid. And at night, apply a lotion with retinoic acid.”
  • Exfoliate! “Dead skin and extra oil clog pores, bringing on blackheads,” says Lindh. “That’s why you need to exfoliate twice a week in the winter, and three times when it’s hot and humid out.” (But avoid scrubbing more often, which can generate more oil production.) Don’t want to invest in another product? Try this skin care tip: Dip wet fingers in baking soda and use that to scrub off the dead skin.

If your face is dry…

  • Opt for creams, not lotions. “Moisturizers that come in a pump bottle have to be thinned out,” says Kazin. Instead, buy the ones that come in tubs, which are thicker and creamier.
  • Get a super-moisturizing sunscreen. “Using [a moisturizing sunscreen] on top of a moisturizer in the morning will do a lot for dry skin,” says Kazin. Or try a moisturizing foundation with sunscreen.
  • Go for a low dose of acid. Using a serum or lotion with retinoic acid can improve the appearance of your skin, but too much of the ingredient can irritate dry skin. Kazin recommends looking for products with 0.05 retinoid, and rubbing it on in the evening. Try exfoliating once or twice per week in the winter and up to three times in the summer.
  • Pile on the products at night. “While you’re sleeping, your skin is hard at work repairing itself,” says Lindh. “So before you go to bed, put on a thick, creamy moisturizer and a moisturizing serum. And one night a week, try sleeping with a moisturizing mask on.”

If you have combination skin…

  • Have a split personality. “When you have some areas that are dry, and others that are oily, you need to have two different skin regimens depending on what area you’re treating,” says Kazin. “For example, usually the T-zone is oily and the cheeks are dry, so use extra moisturizer on your cheeks and a lighter product on the oily parts.” You may need to try out a mix of the skin care tips above.

Photo by Kimia Zarifi on Unsplash

Like this article? Get more by following us on Facebook at Beauty & Confidence.